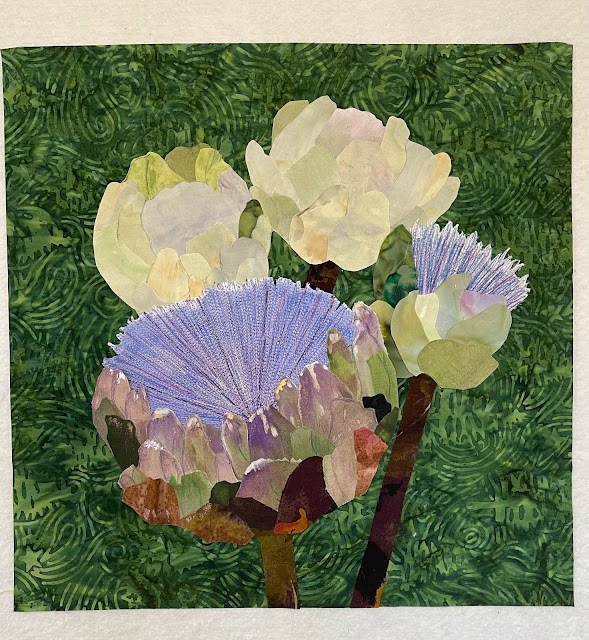
This is what an artichoke looks like if it isn't harvested for food. Left to its own device the top will blossom into a large burst of thistle a pretty blue and lavender color. I had never seen a flowering artichoke until I visited the Denver Botanic Gardens after we first moved here. They were quite fascinating and I took a lot of photographs.
Recently I decided to try and capture the bloom in a small art quilt to hang on my wall. I didn't want to represent it exactly as shown in the photo, but to use the photo as inspiration for a new image made of fabric.
I selected one of the photos and brought it into Photoshop where I applied various filters that emphasized the shapes within the artichoke and enlarged the image to about 15" square, the size I wanted the finish piece.
Starting with the main artichoke, I traced pattern pieces from the full size image and began cutting out the leaves from fabrics I had on hand. Alas, none of them were the right colors, so I got out my paints and painted some plain fabric with leaves until I had the colors the way I wanted them. Painting isn't my forte and this was the hardest part. Once I mustered up my nerve and got into it, though, it was exciting and satisfying.
Here's the bottom of the artichoke made of the painted and cut out leaves which I tacked together with glue stick.
Next up was the thistle bloom. I painted some "stabilizer," a thin fabric made specifically to hold a heavy application of machine stitching without buckling, with blue and pink paint and made sure the shape of the stabilizer fit nicely into the base of the artichoke.
Then I stitched many layers of blue, pink, and lavender threads onto the stabilizer, creating the blooming thistle that you see in the image below. I did the same steps for the small blooming artichoke on the side and the two not-yet-blooming artichokes in the background. All four artichokes were placed separately on the background, varying the positions as I sought the best composition. In this image you can see how one of the artichokes is missing as I glued down its stem.
The green background was all one piece of fabric, so that was easy enough.
Everything had to be quilted and a facing put on the top, bottom and sides so cover the edges which would otherwise be "raw." As a final touch I added some pink and lavender color using Ink Tense pencils to the centers of the top two artichokes so they tied together nicely with the two blooming artichokes.
I liked the whole process and I liked how the piece turned out, but I learned a lot that I want to apply to another version of this subject.
Now I'm using this photo for inspiration. Notice the deep pink zinnias? I love the contrast of those pink flowers next to the purple-blue blooming thistle of the big artichoke.
I've got another center flower started on some stabilizer and am thinking about how to make a background of interesting greens and that lovely pink against the blooming thistle. This photo shows "auditioning" background fabrics.
We'll see what happens!


No comments:
Post a Comment
I'd love to hear from you!